Wednesday, October 25, 2006

That Pesky Tree!

Have you ever seen a tree embed itself into a fence? Well, I have a few of those in my backyard. Apparently nobody who lived in our house prior to us felt that trees do not belong entwined in fences. The house was built in '24, but I am guessing the fence is MUCH younger than that. Somehow several trees were planted, or planted themselves, along the property line and as they grew became entangled in the fence. One of these trees is quite the monstrosity. it is not a huge tree, but it is persistent. I cut all of the greenery off of it the summer after we bought the house, which would have been 2002. I cut it all off again in the summers of '03 and '04. Last summer I left the stupid thing to its own devises, and this year apparently the neighbor was tired of it and cut all the greens off and many of the branches that had grown fairly large in only 2 years time. I told him that I would work on getting as much of it out of the fence as I could, then I'd try to figure out how to "help" the speed of the rotting process.


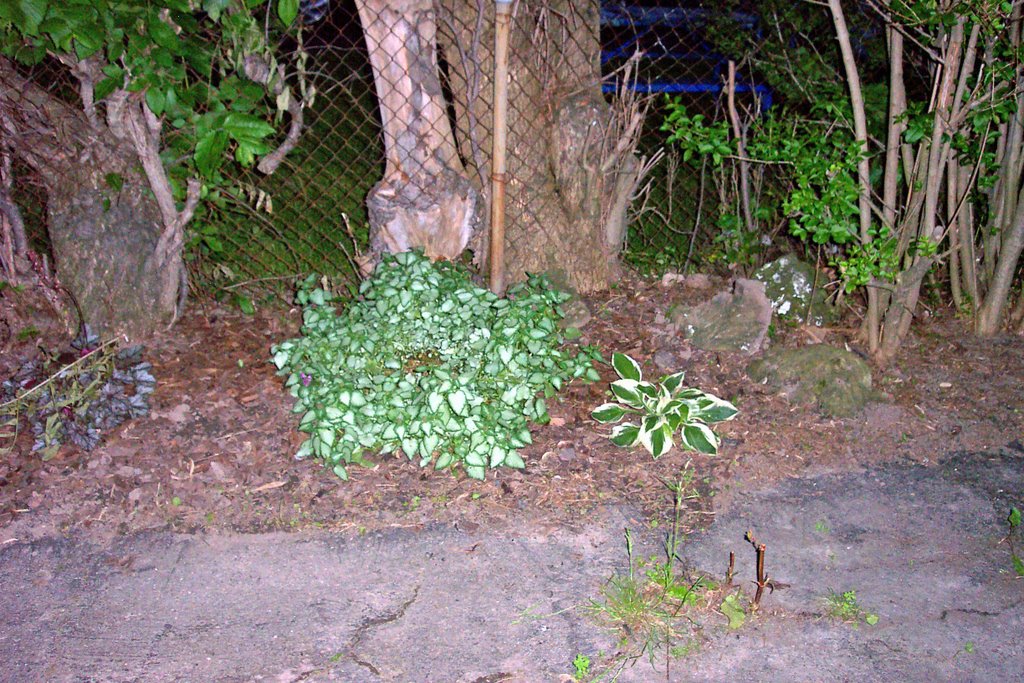
The tree on the far left in this picture is the offending tree. The top of it had been cut off before we bought the house, but the darn thing kept growing! The very dead tree stump in the center of this picture is also entwined in the fence. The bottom of it is mostly rotted away, but the section in the picture is home to many ants and other creepy crawlies.


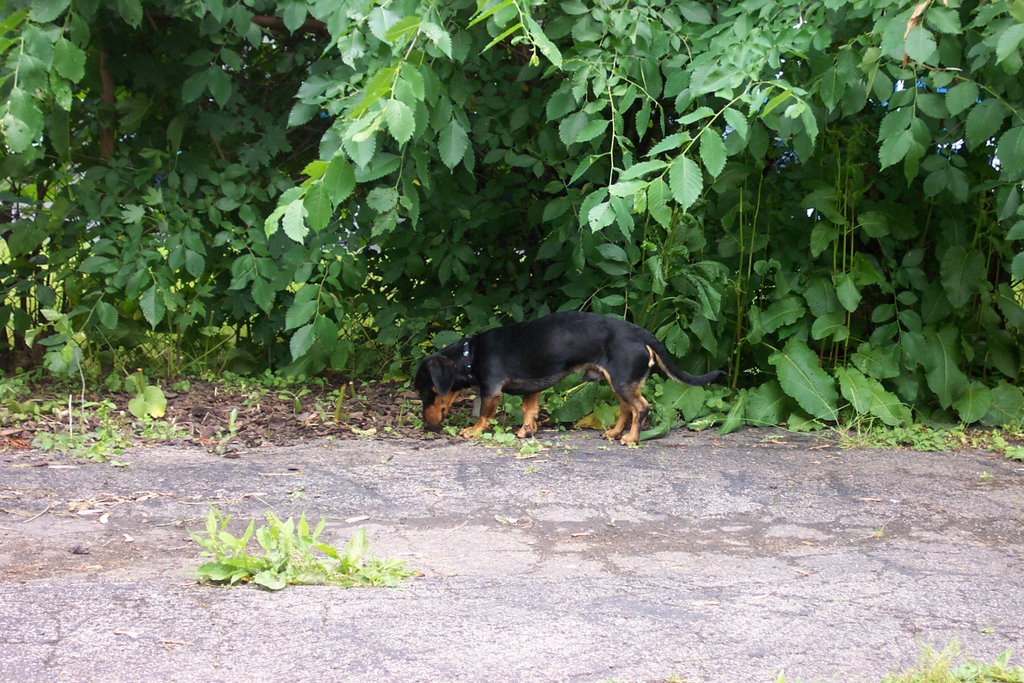
In this picture, all that greenery behind the puppy is from the nasty tree. This was taken in June of this year.

So off on a slight tangent, the other day it was kind of nice out, in that it was not raining. I went out to mow the lawn one last time before winter spreads its beautiful blanket over us. It was about 50 degrees, but I had on a sweatshirt and I was, after all, walking in circles, so I was plenty warm. Kyle was in back cleaning up papers and stuff that had blown into the yard with the autumn "breezes" we have been having. Well, Sarah decided that she too needed to help. She began sweeping the grass off the sidewalks, when Erin appeared, claiming that she too wanted to help. Truly, both girls just wanted an excuse to be outside... Erin had been given a job indoors which had been abandoned as soon as I went out. I sent her back inside to finish and sent Sarah in to get a jacket. Sarah was back out and sweeping in about a minute, and maybe two minutes later, Erin was standing on the sidewalk talking to Sarah, crying her eyes out. I shouted over the mower trying to find out what all the fuss was about and found out we had been locked out! It seems that Miss Erin did not want to get locked out, so she "unlocked" the door on her way through it. I guess it didn't occur to her that I prefer not locking myself out whilw mowing the lawn so the door was already unlocked. Being only 7 she does not really know how to check whether the door is locked or not until she is on the wrong side of it to unlock it.
So, what does one do when locked out of the house for 2 1/2 hours with the temp falling fast???


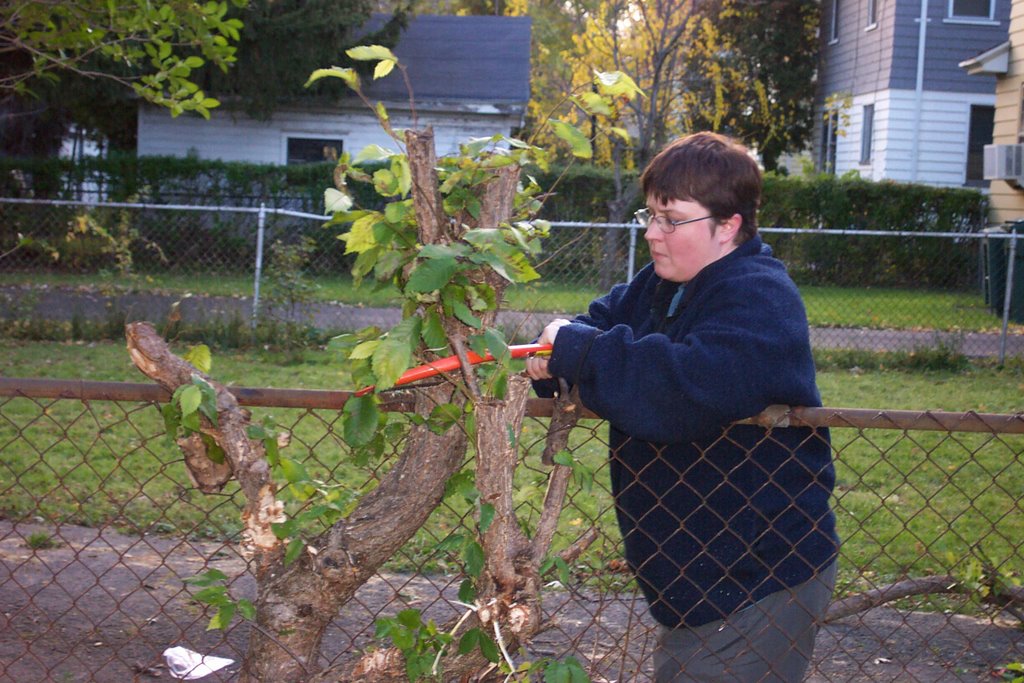
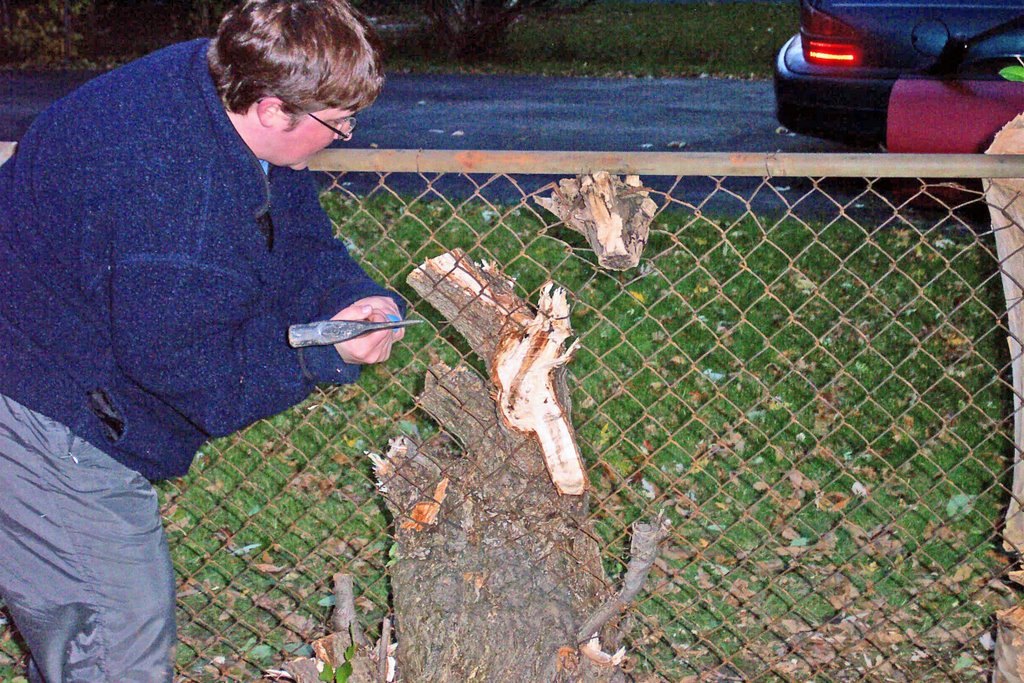
Cut trees out of the fence, of course! Kyle and I used a hatchet and bow saw and cut much of the offending tree out of the fence. We also got rid of a large chunk of the very dead stump in the fence.


Kyle so 'enjoys' having HIS picutre taken, that he decided to take mine in some rather unattractive poses!


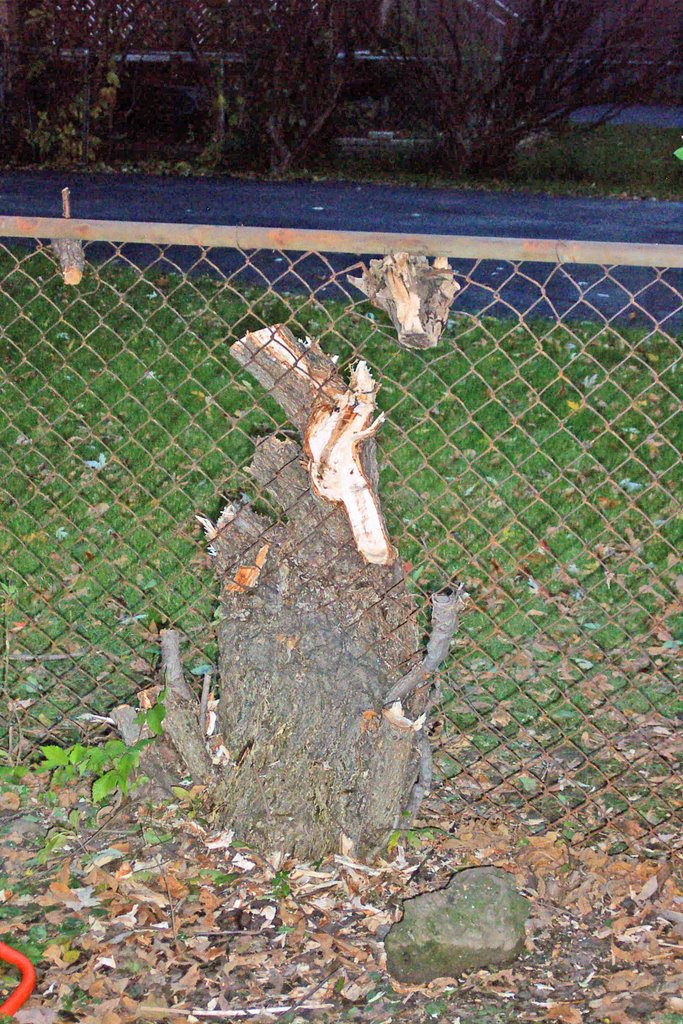
So this is what is left of the horrid thing. I think I'll drill holes in it, fill it with fertilizer, wrap it in plastic and let it rot! Perhaps next summer it will rot away. Of course, I imagine that section of fence will need to be replaced since the tree has caused some of it to corrode away.

Monstrous Fun

Tiring of the same-old-same-old, we took the kids for a field trip to the local science museum, where a dinosaur exhibit is visiting for 3 months. I am not one to get overly excited about dinosaurs, but these things were cool.


They had one on display without its "skin" and it had controls that you could manipulate to move different parts of its body.


When we tired of the dinos, we went to check out a hands-on exhibit...the kids like those best!
Sarah checked out a couple of optical illusions.


Erin went inside this triangle of mirrors, only to find she was too short to see herself. I found her a stool to stand on, and then she could see herself.


Erin and Sarah test their balance on a couple of balance beams. I think the look on Erin's face says it all!


While the kids checked out the other hands-on activities, I tried my hand at building an arch. After 3 attempts, I finally met with success.


Meanwhile, Erin built an arch of her own that Kyle walked across...


and all three kids took turns spinning.
Here Sarah demonstrates.


Much fun was had by all, until I announced that each of them needed to find something they were interested in to do more research on for a science or social studies project. At that point groans and grumbles could be heard all around. Oh, well...they will have fun completing their projects, they just don't know it yet!


Sunday, October 22, 2006

Yummy!

This is my little 4 lb. pie pumpkin that I bought at the store the other day. I decided that I wanted to try to make a pumpkin pie, my favorite kind, totally from scratch...except for the crust.


I went online in search of a yummy recipe and found one at about.com. Excited about making the pie, and tired from working all morning, I failed to notice that the sweetener in this particular recipe is honey. I like honey, but it has its place, and as a sweetener in most baked goods is not it! Of course, by the time I noticed it, I was half-way through mixing everything together.
In case you have never made a pie from a pumpkin, I will explain the process...
First you have to cut open the pumpkin and remove the seeds and stringy stuff. If you don't own a machete, good luck cutting open the pumpkin! We have a Wilkinson Sword and I thought for sure I was going to lose a finger. As I was scraping away the stringy stuff, my youngest came in and asked if she could help. I handed her a spoon and she began de-stringifying the piece I had given her. Next thing I knew, she had reached into the silverware drawer and pulled out a grapefruit spoon. Then, with that cocked-head look that only she can pull off, she said, "Wouldn't this work better, Mom?" I just nodded and agreed...it's best that way.
Once you have the thing cut into reasonble pieces, you coat the "inside" of the pieces with a light brushing of veggie oil, put them flesh-side down on a jelly roll pan and bake at 325 degrees F until the flesh is tender. I found for my 4 pounder, it was about 50 minutes. I also found that if I had cut the darn thing in half and put both pieces flesh side down, the guts would have been easier to puree. The edges sort of "seal" to the pan and create a steam bath causing the flesh to get super soft and juicy. Two of my four chunks did this. The other two were slightly more difficult to work with.
Once the flesh is softened, and cooled, you have to scrape it off the skin. The directions said to either mash it by hand, use a food processor (which I don't have), or use a blender to puree the flesh. I tried the blender and the pumpkin just sat there, stubborn and untouched. I started mashing it by hand when my oldest asked if I could use "that thing you use to make applesauce." He was referring, of course, to my food mill. We got it out and gave it a try. Much to his chagrin I rewarded his suggestion by "allowing" him to turn the handle while I scooped in the pumpkin. This turned out to be a very effective method for arriving at the desired consistency. My little pumpkin yielded about 4 cups of pumpkin puree.
Finally, the mixing and baking. I followed my recipe and had way too much filling, but it turned out pretty good. I am not a fan of honey for sweeting things that are traditionally sweetened with sugar, but it was tasty anyway, as is evidenced by the rather large missing portion shown below. I had intended to take a picture of the pie while it was whole, but I forgot. I made whipped cream to go on top and it was quite a hit for dessert tonight.
As I mentioned earlier, the only thing I did not make from scratch was the crust. I know how, but I do not find making pie crusts enjoyable. The package I bought had two crusts and I only made one pie this time...I guess I will have to make another one...oh, well! :)
This was quite an enjoyable experience and I will definitely do it again. Tomorrow my girls are going to toast pumpkin seeds...mmm!

Monday, October 09, 2006

Cooking Day

Well, we took our apples and made apple sauce and another yummy apple treat. The girls and I chopped up about 15 pounds of apples for sauce.


Once all the apples were cut up, we cooked them down in two pots...


Here's a close up of one of the pots...


Finally, we mashed up all the apples in the food mill...


There is a little cooking station set up right outside the bakery at work, so when I am making bagels in the morning, I can smell all the yummy foods that the chef is making for customers to sample. The other day he brought a pan of apples and squash all cut up into the bakery to put in one of our ovens. It smelled so good even though I am not a fan of squash. He mentioned that the recipe is in the current issue of the magazine that the grocery store produces. So while I was cutting up apples for applesauce and wondering about the sqaush stuff, I remembered that my copy of the magazine was in the dining room. I got it and tried the recipe...

1 butternut squash
2 apples (granny smith, but I used Cortland because that is what I had)
2 Tbsp EVOO
Salt and Pepper to taste
2 Tbsp Honey (lavender honey, per the recipe...I used plain old honey)

Cut the apples and squash into bite size pieces. Mix up all but the honey and spread the mixture out on a sheet pan. Bake at 450 for 20 minutes. Drizzle with 2 Tbsp honey.

I am going to take this to my inlaws for dinner tonight, so I will put the honey on it there after I heat it back up. The girls tried it without the honey and announced that it was "yuuuummmy!"

Here is a picture of all the goodies we made...


Tomorrow we will make apple butter in the crockpot.

Sunday, October 08, 2006

Gorgeous Weekend

This weekend was positively beautiful for the beginning of October. The sky was bright blue, the trees are almost at their peak of change and the clouds look like big puffy marshmallows. Oh, and the temperature must have been near 70. After I got home from work, I decided it would be a good day to take the kids apple picking. We went to a "berry" patch about an hour from our home and were able to pick apples and raspberries. All in all we picked 1.2 pounds of raspberries and 31.4 pounds of apples. The apples took about 20 minutes to pick and the berries took almost an hour. An awful lot of work for such little reward. The berry bushes were pretty well picked over so we had to practically lie down on the ground to see any good berries. Here my youngest inspects a berry. She takes her berry picking very seriously...


Once we were satisfied with the number of berries we were able to find, we decided to go check out the apples. I want to make applesauce and apple butter, so I went in search of McIntosh apples. The first row of McIntosh trees we found had no apples on any of the trees. I was about to be very disappointed, when I noticed apples on the trees in the next row. They were Cortland apples, but they make good applesauce too. We picked HUGE apples. Some were so big that they were nearly the size of my entire hand. Upon finishing our picking, we had to wait in line to weigh our finds and the girls let me snap their picture. My oldest threatened to drop the apples if I tried to take his picture...


We all had a good time, but all of us were quite tired by the time we finished. The place was mobbed with people and the warmer than usual temps for October made for some overheated moments.

So here are some picutres of the 'fruits' of our labor...LOL
One of our two bags of apples. Oh how I wish I could put a scratch and sniff link...these apples smell amazing!


And our slightly out of focus berries!


I am hoping I have enough berries to make a small batch of jelly, but I think we may need to supplement from a farm market or the grocery store.

Saturday, September 23, 2006

Fort Niagara

I have been terrible about posting since I created this blog, so I thought I better catch up. We did some fun stuff this week, so I have some good material for posting.

On Thursday we decided that a field trip was in order, so we went to Old Fort Niagara. It is situated on the mouth of the Niagara River, where it empties into Lake Ontario. It is a neat location because one can look across the river to see Canada without all the customs stuff that clutters up the view at any of the bridges.

It was a bit of an overcast day, but it was warm for mid September and we were all comfortable in light weight jackets. My daughter, who loves light houses, was quite pleased when we arrived at the Fort and there was a light house practically in the parking lot. She snapped a couple pictures of it:


My children took all the digital pictures while we were there, and I tried my hand at film again. It has been a long time and I have forgotten everything I once knew about film photography, which isn't saying much. I need to finish out the roll so I can find out how I did. If any of them turn out I will scan and post some. I have been inspired by my Mom, who has always taken great pictures and has recently begun taking a lot of them. I have never had her talent for composing a great shot, but I am trying. My kids seem to have this talent, so I like to let them take pictures with the digital camera.

As we walked around at the fort, I was impressed by the good condition of most of the structures. As if reading my mind, my son took a few pictures of the architecture:


I suspect he was actually taking picutres of the shield and sign, but I thought they were great pictures of the architecture! At one point, while inside the structure in the bottom picture above, we stopped to look out over Lake Ontario, and saw a skyline. Curious as to what skyline it might be, we asked one of the men in colonial period military garb carrying a musket, what skyline we were seeing. He informed us that it is Toronto. Upon closer inspection, we realized that we could see the CN Tower...very cool. I attempted a picture with my film camera, but I doubt the picture will show anything but the very choppy water of the lake.

We spent most of the day there and had a great time. The kids don't know it yet, but they will be doing some projects for school based on what they learned at the Fort.

Sunday, August 27, 2006

Reminiscing?

Well, I have not been able to work more on my bathroom recently, but I did find pictures I thought I had lost. Working Friday through Tuesday, I am not able to get much done until my weekend.

Here is a picture of my living room after the plumbing in the bathroom blew up:


the stairwell:


And the bathroom, before I began ripping out the floor:


Now if I could just get more time, more money, and more help...hmmm.

Thursday, August 24, 2006

One of those days!

Well, today was one of those overwhelmingly busy days in which nothing seemed to get accomplished. I ran around all day running errands, finding lunch, buying more goo remover for the bathroom, etc. By the time I got home I was exhausted and the day was mostly gone. I decided that if I hurried, I could get the goo off of one more significant area before Jeff got home from work. Anxious to get started, I opened the quart container of adhesive remover I had bought yesterday and poured the last of it on the area I wanted to relieve of goo. I waited the necessary 15 minutes, all the while trying to open the new adhesive remover container. It's one of those push down and turn jobbies that sounds so simple yet requires Herculean strength to work. After my hand became numb, I asked my son to try and still nothing. Finally I gave up, cleaned up what I could of the stuff I had already put down and went to read a book, convinced the container was defetive and would need to be returned. When Jeff got home I explained the problem and with minimal effort he opened the can. Oh, well! At least I can open it now and tomorrow IS another day.

Hopefully tomorrow will bring enough sanity that I can finish the mess I have started on the bathroom floor.

Remodel or Simply Blow it Up?

A few years ago, when we bought our first house, we were so excited, and overwhelmed, that we overlooked a few "flaws" in our new house. Let's just say that anyone who has seen the movie "Money Pit" knows all about our house! Slowly over time I have done a few repairs, updates, and slight remodels.

When we first bought the house, there was carpet everywhere except the bathroom. Since 4 of the 5 of us in the family have allergies to dust and mildew/mold, carpet did not make sense. I ripped the carpet out of the kitchen first, holding my breath, hoping that what was under it was not worse that the carpet itself. Turned out to be 70's orange and gold linoleum. I could live with that. Next I ripped out the carpet from the dining room, living room, stairs, and upstairs hallway. Fortunately under all that was hardwood floors. Unfortunately, they need to be refinished...someday.

After removing all of the carpet, I rearranged the kitchen cabinets and moved the fridge. This was prompted by the Sears installation experts who refused to put in my new stove because they are not allowed to lift appliances over cabinets. Someone decided to put the cabinets in in such a way that the entrance to the kitchen was a whopping 19 inches. Now it is 35 inches.

Next I started removing the drop ceiling from the dining room. I was going to do both the living and dining rooms together, but when my husband Jeff came home to find a fine coating of plaster dust on everything...he was not happy! Then I ran out of steam, or got bored, or something. So for months the furring strips hung from the ceiling, a constant reminder that yet again, I did not finish a project I started. Then one fateful day it happened...

The bathroom plumbing leaked and the ceiling in the living room fell down. I was watching television when suddenly the drop ceiling dropped, onto my head. We called the plumbers and they came to our house to see what the fuss was about. After removing a sizeable chunk of our living room ceiling, our bathroom floor, and our bank account, we had new bathroom plumbing from the sink to the toilet to the bathtub. Then the toilet cracked, unrelated to the new plumbing, and we got a new one of those too. I was too overwhelmed to do anything with the ceiling, the floor, or anything else for a long time.

After about a year of exposed plumbing in the living room, I invited (begged) my parents to come help me put up drywall on the ceiling. It looks much better now, about a year later. But alas, another unfinished project...no joint compound, no pretty joints, no finish...just drywall and screws. So the other day I got to thinking...I need a project. As soon as my hubby left for work yesterday, I began ripping up the nasty linoleum in the bathroom. When the plumbers finished putting in the new plumbing they simply sealed the giant holes they made with cement and left the floor. So some of the floor was the original little, white, hexagonal, ceramic tiles, some was cement, and most was nasty linoleum. The nasty linoleum left even nastier smelly black sticky stuff that is like licorice that smells like a cross between tar paper left in the hot sun and rubber cement.


I found some very potent adhesive remover that dissolves it into a black, gummy mess that is oh, so fun to clean up, but it does get rid of the nasty black stuff. Much of today was spent removing black goo. Hopefully tomorrow I will be able to finish the removal and begin the installation of new vinyl tiles. Not my first choice, but we are just trying to get the house to a point where we can sell it. Don't want to put too much cash into a house we don't intend to stay in for long.

This picture is the end of day one. As you can see, much of the mess is gone, but I still have more than half the floor to finish.